

PIR Sensor
- jpatel
- Dec 19, 2018
- 2 min read
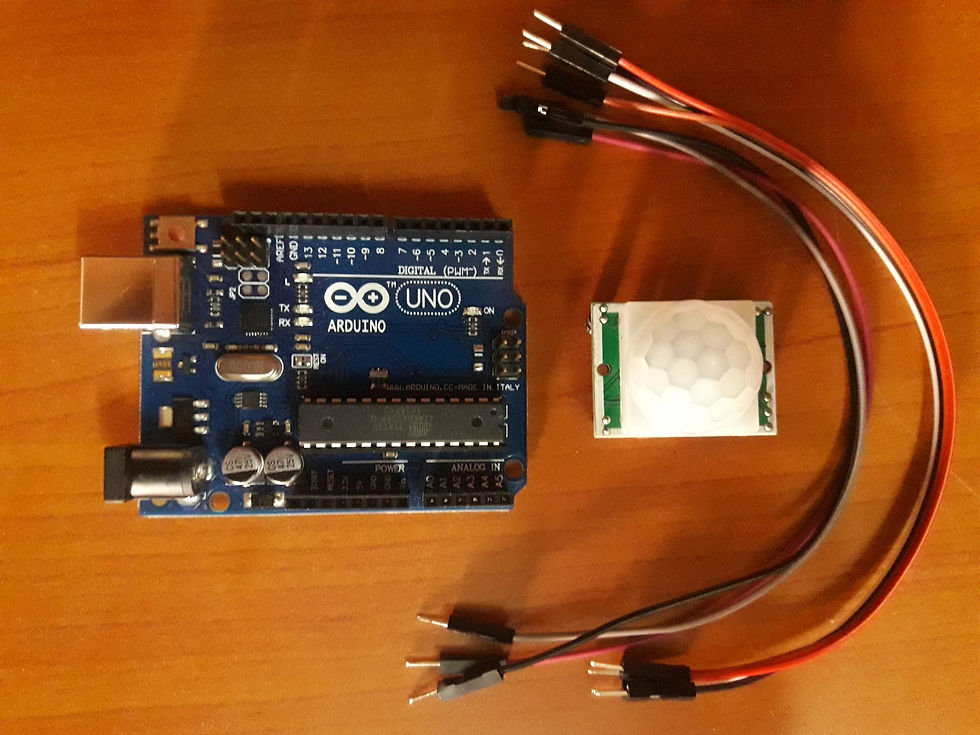
A passive infrared sensor (PIR sensor) is an electronic sensor that measures infrared (IR) light radiating from objects in its field of view. They are most often used in PIR-based motion detectors. An individual PIR sensor detects changes in the amount of infrared radiation impinging upon it, which varies depending on the temperature and surface characteristics of the objects in front of the sensor. When an object, such as a human, passes in front of the background, such as a wall, the temperature at that point in the sensor's field of view will rise from room temperature to body temperature, and then back again. The sensor converts the resulting change in the incoming infrared radiation into a change in the output voltage, and this triggers the detection. Objects of similar temperature but different surface characteristics may also have a different infrared emission pattern, and thus moving them with respect to the background may trigger the detector as well.
PIRs come in many configurations for a wide variety of applications. The most common models have numerous Fresnel lenses or mirror segments, an effective range of about ten meters (thirty feet), and a field of view less than 180 degrees. Models with wider fields of view, including 360 degrees, are available—typically designed to mount on a ceiling. Some larger PIRs are made with single segment mirrors and can sense changes in infrared energy over thirty meters (one hundred feet) away from the PIR. There are also PIRs designed with reversible orientation mirrors which allow either broad coverage (110° wide) or very narrow "curtain" coverage, or with individually selectable segments to "shape" the coverage.
CODE:
//the time we give the sensor to calibrate (10-60 secs according to the datasheet)
int calibrationTime = 30;
//the time when the sensor outputs a low impulse
long unsigned int lowIn;
//the amount of milliseconds the sensor has to be low
//before we assume all motion has stopped
long unsigned int pause = 5000;
boolean lockLow = true;
boolean takeLowTime;
int pirPin = 3; //the digital pin connected to the PIR sensor's output
int ledPin = 13;
/////////////////////////////
//SETUP
void setup(){
Serial.begin(9600);
pinMode(pirPin, INPUT);
pinMode(ledPin, OUTPUT);
digitalWrite(pirPin, LOW);
//give the sensor some time to calibrate
Serial.print("calibrating sensor ");
for(int i = 0; i < calibrationTime; i++){
Serial.print(".");
delay(1000);
}
Serial.println(" done");
Serial.println("SENSOR ACTIVE");
delay(50);
}
////////////////////////////
//LOOP
void loop(){
if(digitalRead(pirPin) == HIGH){
digitalWrite(ledPin, HIGH); //the led visualizes the sensors output pin state
if(lockLow){
//makes sure we wait for a transition to LOW before any further output is made:
lockLow = false;
Serial.println("---");
Serial.print("motion detected at ");
Serial.print(millis()/1000);
Serial.println(" sec");
delay(50);
}
takeLowTime = true;
}
if(digitalRead(pirPin) == LOW){
digitalWrite(ledPin, LOW); //the led visualizes the sensors output pin state
if(takeLowTime){
lowIn = millis(); //save the time of the transition from high to LOW
takeLowTime = false; //make sure this is only done at the start of a LOW phase
}
//if the sensor is low for more than the given pause,
//we assume that no more motion is going to happen
if(!lockLow && millis() - lowIn > pause){
//makes sure this block of code is only executed again after
//a new motion sequence has been detected
lockLow = true;
Serial.print("motion ended at "); //output
Serial.print((millis() - pause)/1000);
Serial.println(" sec");
delay(50);
}
}
}


Comments